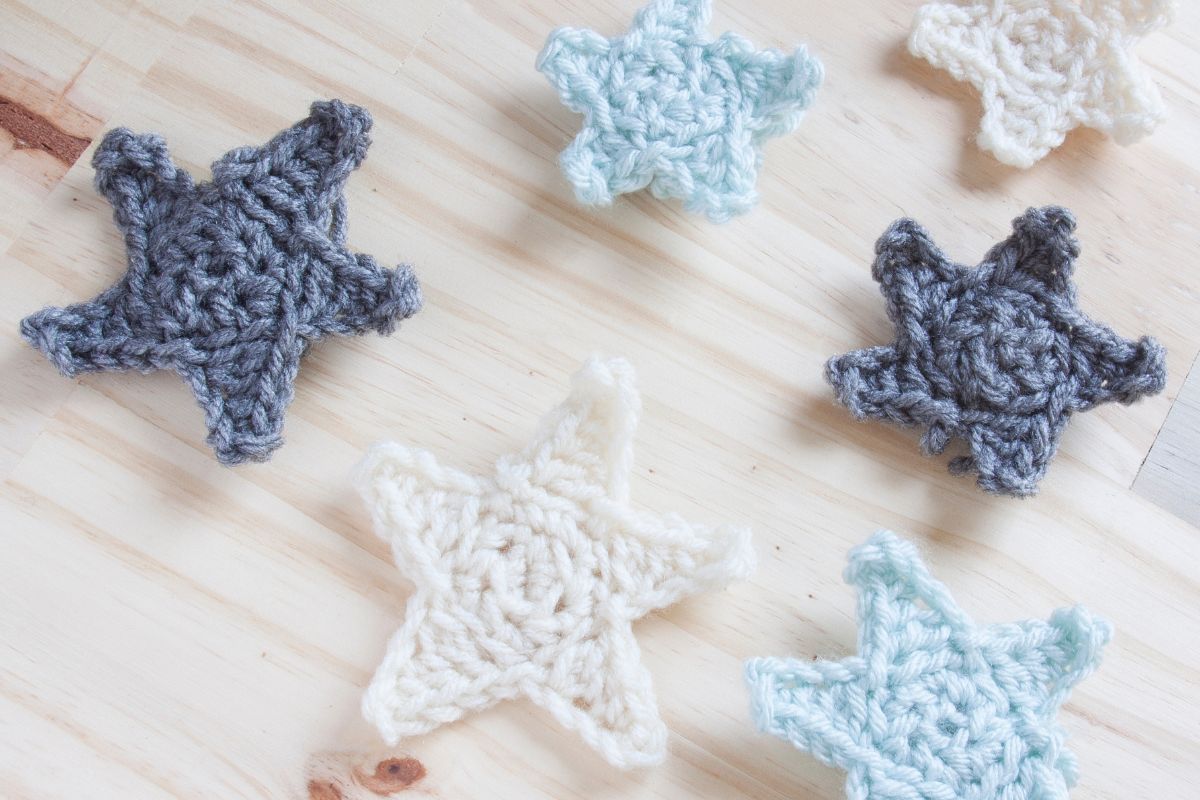
However, learning how to crochet these things often means you need a lot of different patterns to create one project so here is a handy guide on how to crochet a star!
Give it a try and before long, you will be able to crochet a star with ease! Good luck!
How To Crochet A Star
Before you start crocheting your star, it’s important to make sure you have all the tools you need.
This pattern can be done with any type of yarn you may have, just remember to use the appropriate sized hook and keep a pair of scissors and yarn needle handy.
Once you have your yarn and hook ready, make a magic ring and chain one to secure the magic ring down to your hook.
Start with a single crochet stitch, then a double crochet stitch, chain two, and then work another double crochet stitch back into the magic ring. This will create the first point of your star!
Continue this four-step part a further four times so you will finish with a tiny five-pointed star.
To end, work a single crochet into the magic ring and slip stitch into the first single crochet you made for the first point of your star.
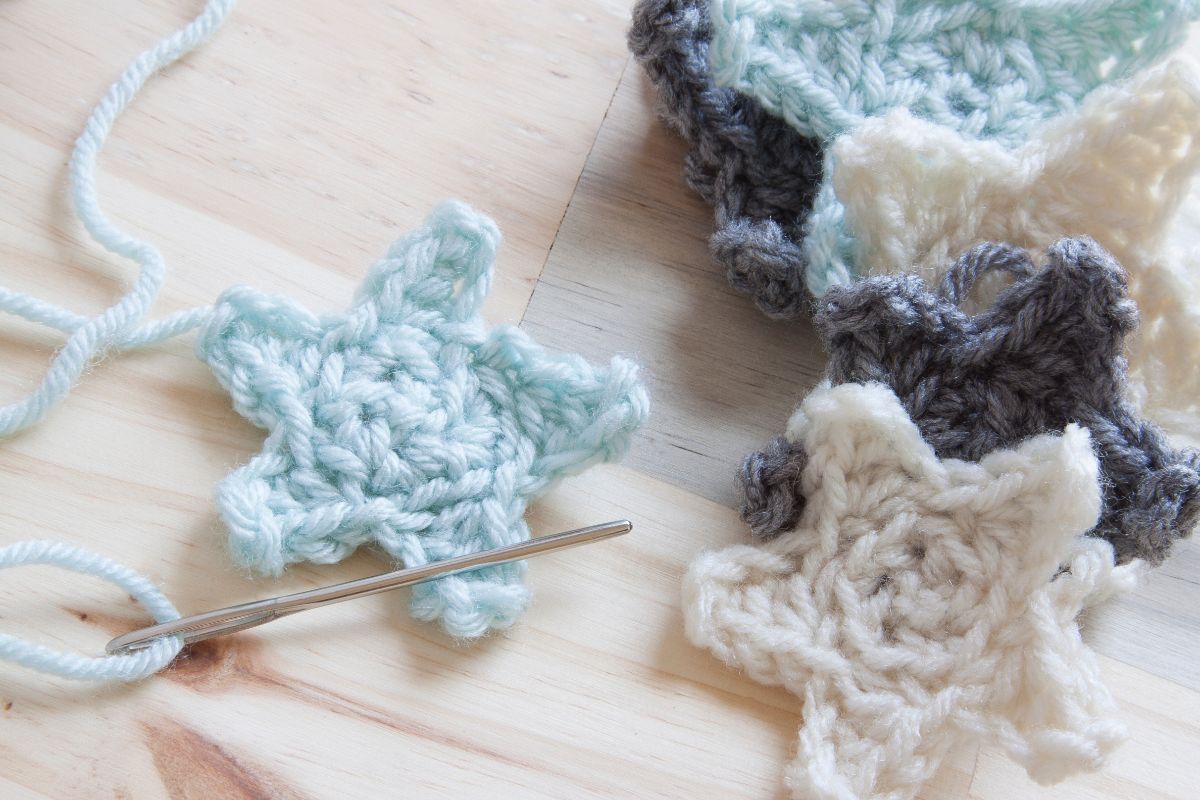
Chain one and then snip off your yarn to create a tail end (make sure you leave enough yarn to serve your purpose), pulling it through the loop tight. Pull the magic ring tail tight to get rid of the center hole.
Take your yarn needle and feed the tail end through the eye. Sew into the final chain you made so it comes out near the magic ringtail.
This is so you can tie them together in a double knot. These tails can be used to attach your star to another project – or just continue weaving them into the star using your yarn needle, snipping off any excess yarn.
Use your fingers to shape the ends of your star so they look more pointy – and you are done!
How To Crochet A Large Star
The above guide is great for making tiny stars for other projects but what if you want to crochet a larger stand-alone star? Then this pattern is the one for you – check it out below!
Bear in mind that this pattern is more complex than the one above, so it’s better suited for more advanced crocheters.
The Body
Start out with a magic ring and lock it in place with a chain one. Then, start making the center of your start by crocheting eight single crochets around the magic ring.
Once your eight single crochet stitches are done, tug on the yarn end to tighten it and close the magic ring with a slip stitch. This will leave you with a solid round center circle – your first foundation round.
The next step is to chain 1 and add two single crochets together for each stitch for the whole work.
So, you will create sixteen stitches in the second round of your star for a larger body. Remember to keep pulling on the yarn to keep the work tight.
You will make five rows in total for the center of your star:
Make your third round with another slip stitch and chain 1 but this time, you will be adding a single crochet to the first stitch then two single crochets together to the second stitch.
Repeat this pattern all the way around the third row until you have made twenty four stitches.
For your fourth round, work a single crochet into one stitch, then another single crochet into the next stitch, and then two single crochets into a single stretch.
Continue this all the way around until you have made thirty two stitches.
For the fifth and final round of your star’s body, do three single crochets into one stitch, and then a single stitch in the next stitch for the next three stitches. Continue until you have completed forty stitches.
The Arms
Now, it’s time to start the first of your star arms.
Begin with eight single crochets and switch to crocheting in rows. Chain one then turn your work and add another eight single crochets with one in each stitch.
From here, you will want to start making your rows smaller and smaller. The pattern begins by chaining one, turning your work, and then adding two single crochet together.
For the next four stitches, add a single crochet in each. Finish the row with another two single crochet together. Chain one, turn your work, and add a row of single crochets in each stitch.
Going forward, you need to drop two stitches so the arm gets smaller and smaller.
For example, the next row will begin with a chain one, two single crochets together, two single crochets, and another two single crochets together to finish the row. Chain again, turn again, and work in a row of single crochets.
Continue this until your arm comes to a point. After your final two stitches together in a single stitch, fasten off the yarn and snip away the excess yarn.
Repeat this step for each of the four other arms of your star, starting back at the bottom of your first star arm. Once all of your star’s arms are done, you will have completed your large crochet star!
In Summary
Crocheting stars can be quick and easy, or longer and more complicated depending on the pattern you follow.
Above, we have included two examples of patterns that will leave you with crocheted stars. The first is great for beginners while the second is more complex.
Once you have mastered the first crochet star pattern, why not test your skills and try making a larger star with the second pattern?
Crochet is one of the most calming and therapeutic crafts out there. It’s a simple dance of stitches, working in rounds, and forgetting the outside world as you create something beautiful.
Hi, my name is Nancy Adriane and I have been crocheting in my free time for almost 10 years.
I first picked up a hook when I was studying in college, stressed and frustrated with the pressures put on me by people around me. The workload got too much, and I desperately needed an outlet.
I tried everything – socializing, cooking, watching TV… nothing helped with the stress. I was too anxious to read a good book and quickly lost hope of keeping on track for the school year.
Enter, crochet. I fell in love as soon as I saw my holey, bobbly hat that I made on a whim. It was too loose to be warm, but I wore that hat every day the entire winter until I learned to make something of higher quality.


")


")
")
")
")