The slip stitch is a basic crochet technique that is used in almost every type of crochet pattern – so, if you’re just getting started out in the world of crochet, it makes sense that it should be one of the first stitches that you perfect.
Besides being an essential stitch technique that crocheters of all levels should learn, the slip stitch is also super versatile and can be used to help join rounds together, seam two pieces of fabric together, and even make professional quality crochet edges, as well!
But, how do you slip stitch, exactly? This is what we’re here to answer.
In this guide, we are going to be providing you with a step-by-step tutorial on how to successfully crochet the slip stitch for the first time. So, without further ado, just read on!
What Is The Crochet Slip Stitch?
The crochet slip stitch is one of the six basic crochet stitches that are used to form most patterns in crochet.
Even though it can sound a little confusing, the crochet slip stitch is one of the simplest to learn, which is why it’s such a great starting point for those who are just getting started in the world of crochet.
Given the fact that the slip stitch is often used to create shapes, join rounds, move along rows, and more, the crochet slip stitch is super useful to learn because it is considered to be one of the most versatile.
Below, we are going to be providing you with a step-by-step process on how to see your crochet hooks to slip stitch in no time at all. Let’s move on to the next section!
Are Slip Stitches Used To Make Fabric?
Unlike other types of stitch techniques that can be used in crochet, it is worth keeping in mind that crochet slip stitches are not typically used by themselves to make pieces of fabric.
In contrast, they are considered to be more of a “foundational” stitch that can be used to help join rounds, move yarn to other parts of the fabric, and more.
Still, it is not impossible to make fabric simply using slip stitches, and it is something that is occasionally done.
If you were to make a piece of fabric utilizing only the slip stitch, then you can expect the fabric to be extremely thick and durable like wool!
Fun fact: this method of creating fabric using a slip stitch is called the Bosnian Crochet or Shepherd’s Knitting.
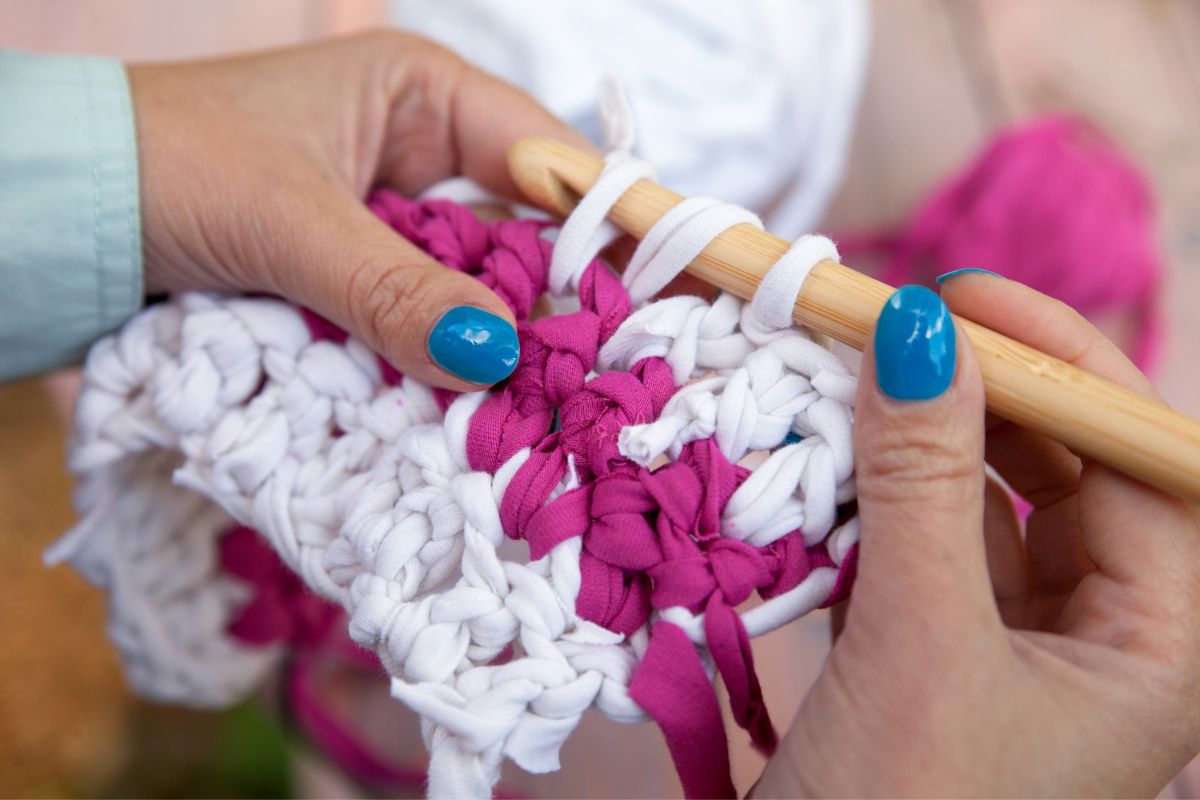
How To Crochet A Slip Stitch
Now that you know a little bit more about what the slip stitch is and why it is so important in crochet, we are now going to be providing you with simple, step-by-step instructions on how to slip stitch for the very first time!
Let’s take a look at some general guidance on how you can do the slip stitch below:
Grab Your Supplies
First things first, you’re going to need to go ahead and make sure that you have everything that you need to be able to crochet the slip stitch.
That being said, you’re going to need to choose which yarn you would like to use (for learning slip stitch, a worsted weight yarn is a great option to use), as well as an easy-to-use crochet hook.
Insert Your Crochet Hook Into The Stitch
Once you have everything that you need and you’re ready to begin, you can go ahead and make a stitch.
After you have done that, place the tip of your crochet hook under both of the loops you have made at the top of the stitch.
Pull The Loop Of The Yarn Through The Stitch
After you have placed the tip of your crochet hook under both of the loops, you can then go ahead and bring the yarn back over the hook (making sure that you are doing this back to front) before proceeding to then pull the loop of yarn directly through the stitch.
Pull The Same Loop Throughout The Loop Of The Hook
After you have pulled the loop of yarn through the stitch, you are then going to need to pull the same loop throughout the loop that is on the hook.
After you have done this, you will have successfully completed the slip stitch! If you have done this correctly, you will find that there is now only one loop left on your crochet hook.
While this can certainly sound a little complicated, the more you put our instructions into practice, the easier you are going to find the slip stitch! In no time at all, you are going to find that you will be able to pull the yarn easily over and through the stitch and the loop in one flowing motion.
How Can You Use The Slip Stitch?
Once you have mastered the slip stitch technique, we’re sure that you will be keen to begin putting it into practice!
As we have mentioned above, even though you can make slip-stitch crocheted fabric, this is not something that is commonly done.
Instead, the slip stitch technique is typically used to help aid a different type of crochet technique. Below, here is a quick breakdown of the most common way a slip stitch is used:
To join ends: The slip stitch is commonly used to join the ends of a foundation chain to a starting ring.
To make edging: Along with joining ends, the slip stitch technique can also be used to create edging of completed fabric.
To decorate: The slip stitch is also commonly used to add decoration to the surface of crocheted fabric.
Wrapping Up
You’ve made it to the end!
Now that you’ve taken the time to read through our slip stitch guide above, we hope that we have been able to give you a better understanding of what this crochet technique is, as well as how to do it correctly.
Crochet is one of the most calming and therapeutic crafts out there. It’s a simple dance of stitches, working in rounds, and forgetting the outside world as you create something beautiful.
Hi, my name is Nancy Adriane and I have been crocheting in my free time for almost 10 years.
I first picked up a hook when I was studying in college, stressed and frustrated with the pressures put on me by people around me. The workload got too much, and I desperately needed an outlet.
I tried everything – socializing, cooking, watching TV… nothing helped with the stress. I was too anxious to read a good book and quickly lost hope of keeping on track for the school year.
Enter, crochet. I fell in love as soon as I saw my holey, bobbly hat that I made on a whim. It was too loose to be warm, but I wore that hat every day the entire winter until I learned to make something of higher quality.


")
")
")
")

")